Monday, November 14, 2011

Hello Fall

Fall is finally here and with it comes a renewed joy of baking. The hot oven no longer brings beads of sweat along my forehead, but comfort and joy like a warm blanket around my shoulders. I love being in the kitchen, but loathe becoming drenched in sweat from a heavy work week. Fall and winter bring relief from the negative side of food business and I have been busy relishing each cool breeze through my kitchen window. This is the first post of several "batter-licious" recipes I've been making of late. I hope you enjoy them all. 

Preparing this particular recipe was a learning experience. Not because the recipe is difficult - it isn't. Not because the ingredients were difficult to find - they weren't. Simply because I realized that I have acquired a severe allergy to uncooked pumpkin containing pumpkin pulp. Did you know that one can be allergic to the seeds and pulp of pumpkin, but not the meat? This is certainly the case and extremely so in my situation and more disturbingly appears to be a recent development as I can't recall any reactions to pumpkin seeds or pulp in the past. Watermelon, yes. Bananas, for as long as I can remember, but not pumpkin. At any rate, I will tread carefully from this moment on when dealing with pumpkin. I was in the process of making this bread, batter prepared, in the pan and in the oven when I couldn't resist a quick lick of the spatula before washing the mixing bowl. What followed was unlike any allergic reaction I have had. First, you must understand the full picture. I was home with all four kiddo's by myself as my hubs was in Colorado attending a conference. I am still nursing my youngest which in and of itself is kin to a full time job. We had been decorating for Christmas, so the house was a bit messy from the fake pine needles and the dusty attic storage containers. I had been in major multi-tasking mode, feeling energized by the cooler weather and attempting a mad deep cleaning spree much  like a spring-clean-out-everything-and-reorganize-my-workspace-and-every-closet whirlwind when I was struck with the thought to make pumpkin bread as well. Then one lick of that raw batter and my energy spree came to a screeching halt. Within minutes the whelps began appearing, first on my arms, then on my neck, finally on my back, stomach and face, while watching my hands swell at an incredible rate. At first I thought my older children must have brought in poison ivy oil on their clothing after an afternoon rendezvous in the brush surrounding our yard, but quickly realized I was the only one affected and they were perfectly fine. The next several hours were difficult to say the least and ironically, the pumpkin bread was quite enjoyable though I had to wait until the next day to devour a slice as I was quickly reeled into bed by the aid of benadryl while covered in steroid cream. Alas, do not lick the batter, but do make the bread. I'm certain things like this only happen to me. Quite sure of it.

Pumpkin Bread

1 1/2 cups pumpkin puree (fresh or canned)
3/4 cups vegetable oil
1 1/2 cups sugar
1/2 cup brown sugar
3 eggs
2 1/4 cups all-purpose flour
1/2 cup chopped pecans
1 tsp. baking powder
1 tsp. baking soda
1 tsp. salt
1 tsp. ground cinnamon
1 tsp. ground cloves

Preheat oven to 350 degrees. Grease and flour two 9x5 inch loaf pans. In a large mixing bowl, mix together pumpkin, oil, sugar, and eggs. Combine the flour, pecans, baking powder, baking soda, salt, cinnamon, cloves and stir into the pumpkin mixture until well blended. Divide the batter evenly between the prepared pans. Bake for 45 minutes to 1 hour - the top of the loaf should spring back when lightly pressed. Butter a warm slice and enjoy!

Saturday, October 22, 2011

Random Thoughts on Art


Last night I enjoyed an evening out with friends at a local "Ladies Night Out" event. I ran into an artist friend who shared with me her recent adventures in creativity, chatting briefly about a painting she recently sold and about the commissioned piece she is currently working on...I reflected on our conversation this morning while I was performing my own personal work of art magic tricks - applying makeup, an act that always conjures thoughts of  the transformation from caterpillar into butterfly. Thinking about my artist friend, her career, and the relaxing elements of painting, I remembered a piece I had seen on display at my neurologist's office. One he had created himself - literally, a large glob of bright green paint smeared across two canvases, hung side-by-side and bearing his name in the lower right corner. This led me to the desire to pull out a fresh canvas myself and smear some paint around - a hobby I love to engage in, but rarely find the time and even now must continue to postpone. All of these thoughts left me with the same summation...that art is relative.  The style that each of us finds pleasing can vary greatly from fine detailed landscapes, to portraits, to large globs of paint carefully placed to look as if they were thrown together. I love to look at paintings - initially at a distance to take in the overall picture and then up close, very close, so as to see each brush stroke. The tiring thing about living in my head is how quickly my train of thought can race away from me, finally settling on a new realization or a brief meditation.  All of this pondering resulted in a fresh awareness that a mediocre piece of art could easily yield great sums of money if created by a widely renown individual, artist or no.  If Steve Jobs had been inclined to push some paint around I feel certain a number of his faithful fans would step right up to bid on a piece created by him, if for no other reason, simply to have something he had touched. Don't misunderstand...I love my iPhone and Steve Jobs definitely shaped society as we know it. Simply amazing. Yet I can't help but recognize my possession of the greatest creation ever given to man and how grossly undervalued it has become. Many never touch it or look at it, let alone have it on display in their home. While I don't habitually present it to my guests as my proudest acquisition, still it continues to change the world. Anyone can acquire this work of art in a variety of price ranges, sometimes even for free. Hmm...the Bible. Why isn't it more cherished? Why do Bibles stay covered in dust, sitting in the corner or on the bottom shelf of the bookshelf? Why haven't I examined it up close, taking in each brush stroke? Wasn't Jesus way cooler than Steve Jobs? Aren't his miracles more worthy of display than a Van Gogh? The item that should be my most valued possession is frequently the first thing I pass over, the last thing I show off. Truly...art is relative.

Wednesday, October 19, 2011

Omega-3 Bliss

I have no words for the delectable result of this recipe - simply put...it was finger-lickin' good. Since I'm writing this post in the a.m. hours I'm running low on verbiage (catch me at midnight and I'm full of awesomeness). Fry some up tonight for an extra dose of Omega-3 madness. Enjoy!

Pecan Crusted Tilapia

8-9 Tilapia fillets
1 1/2 c. bread fine bread crumbs
1/2 cup finely chopped pecans
1 Tbs. parsley
1/2 tsp. garlic powder
1 tsp. salt
1/2 tsp. pepper
1 tsp. dill
1/2 cup flour
1/2 cup milk
vegetable oil

You will need three shallow dishes for the dredging of the fish. I use glass pie plates, but use whatever you have making sure your dishes are large enough to hold a single fillet. Place the flour in one dish, the milk in another and the bread crumbs, pecans, parsley, garlic powder, salt, pepper and dill in the third. Pat dry your tilapia. Working with one fillet at a time, dip first in the flour, followed briefly by the milk and then roll in the bread crumbs until evenly coated. Continue with each tilapia fillet (we had nine fillets in all). Heat about 1 Tbs. of vegetable oil over medium/high heat in the bottom of a skillet or saute pan. I've found that a non-stick pan works best. Working with only 2-3 fillets at a time, fry for about 3 minutes on each side or until a nice, even, golden brown. After about five fillets I've found that I need to wipe out the pan and use another Tbs. of fresh oil to keep from burning the little crumbs that fall from the fish. Remove your fillets from the frying pan to a paper-towel lined cookie sheet to drain briefly before transferring to your serving platter. Or, leave them on the cookie sheet and serve them up from there, right on the back of the stove, like we sometimes do at our house because we're not always fancy....four children under the age of 11 live here...we don't always make it to fancy.  Sometimes, we're just lucky to get dinner done on time. Oi vey.

Tuesday, October 11, 2011

Not-At-All-Famous Chicken Soup

My sweet husband, unfortunately, is sick. This, by itself, is not anything catastrophic, but throw in his commitment to sing three French songs as part of a university faculty recital on October 25th and a head cold can become a major concern. We're proactive around here and taking the bull-by-the-horns sometimes often leads me to trouble at a faster rate than normal; however, this time, I knew my preemptive measures would be, in the words of Martha Stewart, "a good thing". Lucky for me, I was prepared, as always big surprise, with several whole chickens tucked away in the deep freeze and quickly thawing one to produce what has now been dubbed the "best chicken soup you've ever made" elevated me to the place of heroine for the evening. A girl does what she can. *sigh* After observing our 20-month-old son devour three full servings, I believed it must be pretty good (kids are, after all, brutally honest) and good things are meant to be shared...

Here's what you'll need:

1 whole chicken, rinsed
1 large onion
2 stalks celery
2 large carrots
1 Tbs. minced garlic
2 Bay leaves
2 Tbs. kosher salt
2 tsp. black pepper
1 Tbs. dried basil
2 sprigs rosemary
1 12oz. package fettuccine

First, cut the skin off of the chicken. Don't skip this step - it seems simple enough to cook the chicken with the skin on, but you want to really maximize your broth with juices from the meat and bones - not the fatty skin! It only takes a minute or two longer to cut/peel off the skin. Place the chicken breast side down in a large pot and cover almost completely with water. Turn the heat on to medium-high.

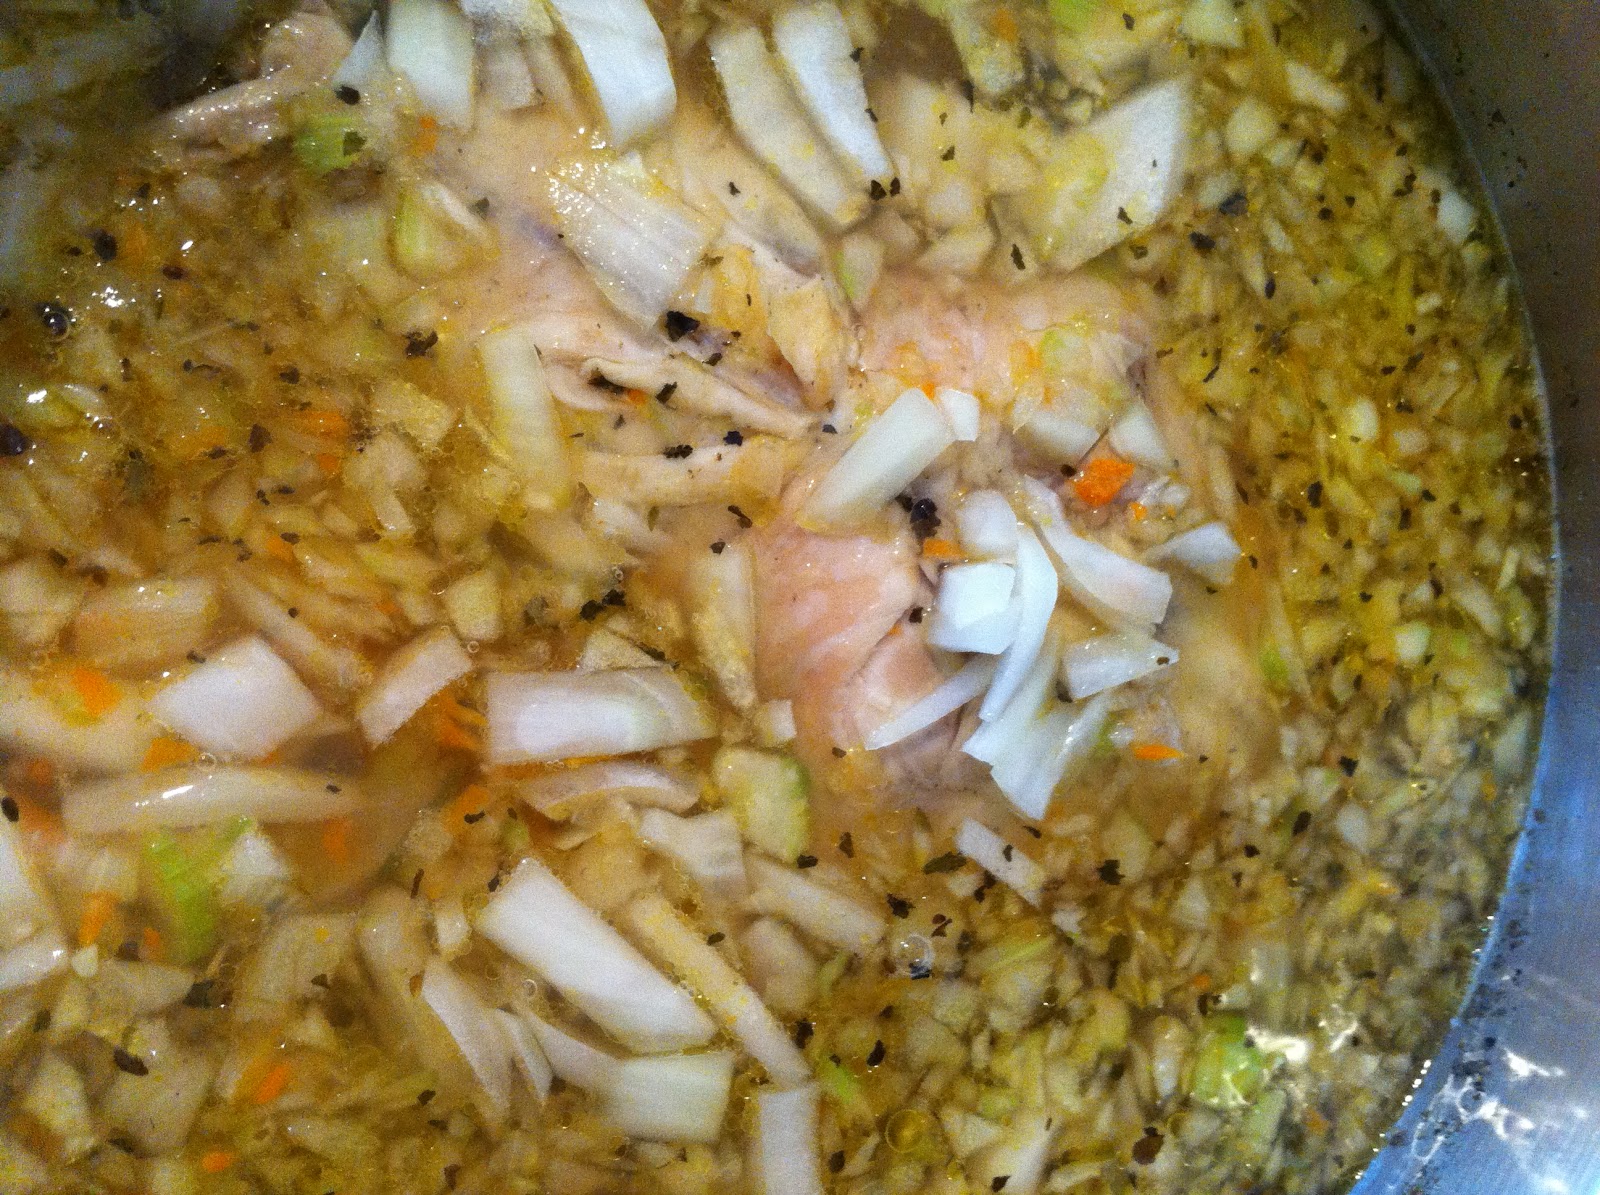
Now place the onion, celery, and carrots in the bowl of your food processor and pulse until finely chopped. I left a little onion out to coarsely chop by hand just to add texture, but you could easily pulse it all. Add vegetable mixture to your pot with the chicken. Now stir in salt, pepper, garlic, basil, bay leaves and rosemary. After you've compiled everything together in the pot, it should look something like this:
When mixture reaches a low boil, reduce heat to simmer, cover and cook for approximately 1 hour. Remove the chicken from your broth, cool and remove meat from the bones. While you are waiting for the chicken to cool enough to handle, add an additional 4 cups of water to your broth, turn the heat up and bring to a boil. Break the fettuccine into 2-inch pieces and stir into boiling broth; cook until noodles are tender, about 10-12 minutes. Then turn the heat off and return the chicken to the pot, stirring well to combine. Serve and enjoy!

Tuesday, October 4, 2011

Waste Not, Want Not

I started this post a good 2+ weeks ago and somewhere after the first sentence or two, life took the reigns and ran away with me. Left me sort of white-knuckling-it, much like how you feel on a super-high-speed and way-too-dangerous roller coaster. I finally jumped from that ride, but merely landed on a runaway train, so I'm really not sure that anything changed; however, somewhere mid-leap I had time to revisit this recipe and throw a few thoughts down. *WHEW* I want to go on record as stating that I've also started a biscotti post that is well over a month old and I may actually finish it this week as well...but don't hold your breath.

When it comes to ingredients, I like to use every bit of every item. So when I recently made two roast chickens for my family, I went to bed haunted by the carelessness of throwing away the bones. Why didn't I save those to boil low and slow into consomme? Why? Oh yes, because at the time it was 100+ degrees outside and the thought of keeping one of my stove burners flaming away for 24 hours adding at least 10 degrees to my kitchen temperature...well, the mere thought of any extra heat trumped my need to be frugal. I did, however, save every last morsel of chicken and chopped it up the next day to make this yummy twist...much like a stroganoff, but with chicken instead of beef and with our leftover steamed broccoli stirred in at the last moment, yielding a huge pot of this scrumptiousness; much to my delight only a small amount remained after three of the males in my home devoured two heaping servings each.

3 cups diced cooked chicken
1 yellow onion chopped
1 stick unsalted butter
1 Tbs. kosher salt
1 tsp. black pepper
2 tsp. garlic powder
1 tsp. corn starch
1 cup sour cream
1 1/2 cans chicken broth
1 tsp. horseradish
1 Tbs. dijon mustard
16 oz. box farfalle, cooked to package directions
2 cups diced cooked broccoli

Melt butter in a medium size saucepan, add onion, salt, pepper and garlic powder, cooking until onions are transparent. Add corn starch, whisking to avoid lumps. Add chicken broth, sour cream, horseradish and mustard, continuing to whisk until well combined. Keep warm over low heat while cooking pasta. Remember, you want the sauce to be a little thin and plentiful. Pasta is absorbent and much of the sauce will be soak right in, so if at any time the sauce begins to thicken (like gravy) add more chicken broth and thin it back out. After draining your farfalle, return pasta to your pot and stir in the diced chicken and the broccoli, then add sauce to the pasta and stir well to combine. Enjoy!

Tuesday, September 6, 2011

Salmon and Black Bean Patties


We're big fans of seafood here and while we typically consume our underwater friends in whole fillet form, I've lately begun experimenting with canned varieties primarily out of convenience and partially out of my desire to leave my oven OFF during 100+ degree days. Anything that can be achieved on the stove top is a blessing. My experimentation recently yielded these delicious, relatively low-fat salmon and black bean patties. They were a big hit among the little folks and tasted just as good when reheated the next day - another bonus for a large family and a hot summer - leftovers!

Salmon and Black Bean Patties

2 14oz. cans alaskan salmon, drained and picked over for bones
1 cup canned black beans, rinsed and drained
3 eggs
1 bunch cilantro, chopped fine
1 1/2 cup bread crumbs
1 1/4 cup mayo
1 tsp. pepper
1 Tbs. dijon mustard
Olive oil for frying

In a large bowl combine the salmon, black beans and bread crumbs, stirring well to mix through (sometimes I have to get my hands involved to make sure the salmon is well distributed with the bread crumbs). In a separate bowl, whisk together the eggs and mayo until combined; stir in cilantro, pepper, dijon mustard and mix well. Pour the egg mixture into the salmon mixture and combine thoroughly. Lightly oil a large non-stick frying pan with olive oil and heat over medium heat. Using a medium size scoop, shape the salmon mixture into patties and press lightly into the hot pan. Be sure not to get your frying pan too hot as you'll brown the outsides before you've had a chance to heat the patty through. You want them nice and golden brown and lightly firm. WARNING: this recipe makes A LOT! At least a good 30 patties depending on how big you make them and if you're not into leftovers like we are, you may want to cut the ingredients in half or only cook half of the salmon mixture and freeze the rest to be fried up at later date.

Sunday, September 4, 2011

Aaaannnd We're Back!

I've been trying to simplify my life. De-clutter, reorganize, streamline, call it what you will, but the reality is...I take care of a few folks here on the home front and they eat up a lot of my time so the simpler the better. Trying to maintain a food blog and still find time to write an occasional post over on Random Thoughts from the Motherworld (a task at which I obviously failed) became all too much on my already full plate. I'm combining the two into one and hoping that keeping my focus on a single (!) writing outlet will allow a little more clarity of mind. The new format - cleaner, brighter and hopefully easier on my psyche. As always, you'll find new recipes here as well as all of the recipes from my past blog, La Dolce Vita. Now throw in an occasional post depicting happenings within my family/personal life and maybe even a few random thoughts on other topics. Somewhere amongst the four kiddo's, the full-time business, the home school curriculum, the grocery shopping and the laundry (!) I will do my best to post on a regular (somewhat) basis. Right now, I'm just thrilled to have accomplished the blog makeover...cause photoshop is hard. For me anyway. Taking on the task of creating a custom header in my nonexistent spare time became a daunting endeavor, but in the process I kinda, sorta mastered designing in photoshop and feel a tad bit powerful about it. At any rate, I muddled through and am ready to once again begin dropping morsels in written form...just don't get too excited.

Thursday, July 21, 2011

I'll Be Back

It's been too long since my last post. Sadly, it will be even longer still until I'm dishing up new and savory recipes for you. La Dolce Vita needs a facelift (as do I!) but for now, I'm aiming my focus toward giving my written word a new, fun and fabulous format through which I can bring you fresh photos of deliciousness with accompanying recipes! I'm excited about the newness of the upcoming blog (new name and everything!) but a little daunted at the undertaking of developing yet another project. So, stay with me, be patient, and in the infamous words of my favorite terminator..."I'll be back". In the meantime, keep up with my busy-ness by "liking" my business page on Facebook - HERE.